The “Loom” is the tool that holds your weaving together while you are working on it. It’s basically a frame. In this exercise you will make a “pop flat” cardboard loom. Since this is just the tool and not the art work, and it’s disposable when you’re finished, it doesn’t have to be pretty, just functional. And the materials are FREE!
Materials: pop flat box (shoebox lid would work too)
Sharpie marker
scissors
string (thin but sturdy)
STEP 1: Have the box vertical. The one in the picture is horizontal because the ends were not well constructed, but I prefer vertical. Lay the ruler along the edge and with the Sharpie make a mark every 1/4 inch. Do the same on the other end.
STEP 2: Cut down each mark about 1/2 inch, creating “pegs”.

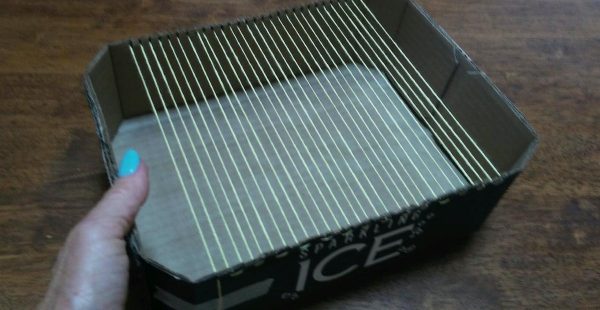
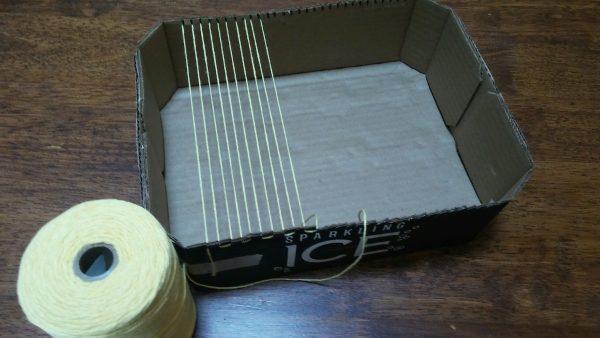
STEP 3: Tape the string, called “Warp string”, on the outside of the bottom left corner. Pull the string through the top first slot, wrap around the peg and back down to the bottom to the second slot and around the peg. Repeat until all pegs are used. Tape down the end of the warp string. Make sure the string is taunt, but not so tight it bends the pegs. This step is called “warping the loom”.
Your loom is ready to use!! Not only is it cheap, we are using a box for this loom to give you space to work the yarns from both sides. In our next session, we can begin with a basic weaving pattern.